I have learnt a variety of techniques throughout this project. First of all I learnt about aspects of the camera which we would use for filming. I learnt of the 180 degree rule in which once you have placed the camera down you can only film in a certain space whilst in the same scene to avoid the audience having to go through confusion and disorientation. However this was not really a priority to remember whilst filming shots for our opening as there were no typical conversations or shot/reverse shot moments where the 180 degree rule can easily be broken. I learnt how to set the camera to widescreen- the format we were required to film in and the white balance and how to set it, gaining the knowledge that if I didn't then the colour would appear to bright, dark or mismatched. I learnt that whilst filming you must always be careful and not rush, making sure to check everything about the camera is how you want it. The group learnt this lesson due to two of our scenes not being filmed in widescreen due to us forgetting to change the settings, meaning we had to re-film them.
The most important thing that I have learnt and put into practice is the skill of filming scenes using different shot types and angles that can later be edited together to make a particular scene more interesting as you see it from different angles and perspectives. It also breaks up the action more which puts an end to long takes from one angle which can become boring. For example the first scene of a victim walking is broken up between a long shot from a side view, a front view shot and a rear shot as he walks. Below are stills from our opening providing examples of the various shot types and angles we have used:
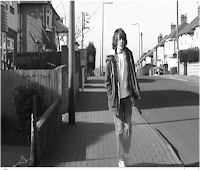
This front view long shot allows you to see the identity of the character, all of their body and the action they are performing and allows you to see the location.
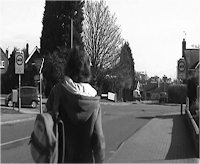
This rear shot allows you to see where the character is headed and the location they see.
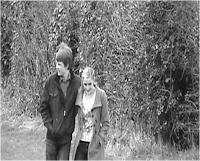
This front view mid- shot allows you to see the character's location and that they are walking but allows more detail of their faces, this is needed to establish their happiness and their innocence and lack of awareness of what is to come.
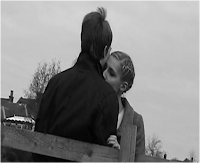
This close up allows us to see more detail of the characters and represent their closeness as a couple. It also allows us to see a change in mood as the girl starts to notice something in the bushes. A close up allows the audience to realise she has seen something, from a long shot they would not be able to tell.
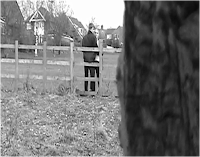
This long shot is from the point of view of the killer. It reveals that someone is watching them and builds up tension, especially when the scene keeps alternating between this shot and the close up shown above.
I also learnt that you can use shots to create meaning or representations. For example we used a high angle shot to make a victim seem vulnerable as they are watched by the killer, unfortunately this scene was cut from our opening. The still below illustrates when we filmed from this angle to create representation.

Another important skill I learnt was how to put the different shot types and angles together in a sequence using the editing software Adobe Premier Pro. I learnt that you had to go through the process of cutting the shot down using the cut tool, and then placing it on the timeline next to the previous shot. I learnt that consistency and continuity are important to maintain throughout the opening. Below are examples from the editing process where I put what I had learnt about cutting, editing shots together and continuity into practice.
- We filmed a scene of a couple walking through a park field from several shots and angles. The first shot of the couple is a front view as they walk towards the camera. We then edited the footage to cut to a long shot from a side angle by placing it next to the previous shot on the timeline. In this shot the boy who I play turns to look to the side, this is where we decided to cut back to the front view. We edited this so the front view shot appears again when I return my head from looking. This creates a flowing scene where the different angles match together, again ensuring continuity.
- For the end of our opening there is a close up of the couple hugging against a fence. We edited this so the camera cuts between both sides of the couple alternating between seeing the boy's face and the back of the girl and vice versa with a long shot from the viewpoint of the killer as the girl starts to notice something. This creates tension which builds up to the climax which is where we placed the shot of where the camera drops and you see the killer run towards the couple.


The camera alternates between these shots.
- We filmed Andrew walking down the street from a side viewpoint from the other side of the road, in front of him as he walked towards the camera and behind him as he walked away. We placed these three clips together on the timeline starting with the side viewpoint before cutting to the front view and then the rear view. We spent a lot of time cutting little sections away so they matched with each other, meaning the continuty was met. For example at the end of sideview shot Andrew walks past the end of a wall and as the camera then cuts to the front view he needs to be in the same position so we cut the clip so it started with Andrew next to the wall meaning it follwed on accurately.
I also learnt how to use various other aspects of Adobe Premier Pro such as inserting titles and music to enhance the opening. I also had a look at the various visual effects you could add such as transition types- we opted for a fade transition as it subtly moved between the scenes. I also learnt how to set up and maintain a blog, something I have never done before. I have enjoyed doing this as it is a different way of presenting your work and allows the insertion of pictures and clips and this makes a change from writing an essay. However I found that doing so can be very fiddly and time consuming. Overall, I have learnt a lot from the project and I am proud of how the group used different shots and angles and edited them together.
No comments:
Post a Comment